#11 One Minute Quickies: 10,000 Volts in 3 steps
Why?
Tesla and Van der Graaf made me do it. Just thought you might enjoy some more quickies...
What?
This one's a doosie. Ever so easy.
1. Get something on the screen. Anything. I put some letters into the middle of a small window...

Fig 1) some type on the screen, or anything else, really...
2. Now do this: make a copy (Image > Calculate > Duplicate, click ok) (Tip >>> you may start to do this duplicating bit a lot, that's an excellent candidate for a Quickkeys macro. Include the "Ok" in it so you get a copy with a single keystroke. Mine is `command-d') and in the new window use Filter > Blur > Gaussian Blur. Set it to something quite high, in this example I used 33...

Fig 2) Blurring the sh*t out of the type....
3. Next up: Use Filter > Stylize > Find Edges and watch what happens. Not a whole lot. What gives?

Fig 3) The seemingly less than exciting results of Find Edges....
4. Now for the coup-de-ville: Hit command-'e' (that's the shortcut for Image > Map > Equalize)
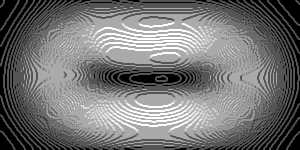
Fig 4) Voilá: Instant Electric Aura!
How?
Well, to get into the theory behind this: it all revolves around "Find Edges". This filter marks significant transitions in each channel (here only one, gray) with higher intensity, resulting in bright edges against a dark background. In color images this happens for R,G and B separately, leading to sometimes very messy, though interesting, results. In our case here, we are giving the Find Edges filter a tricky problem: there are hardly any edge transitions left after the deep Gaussian Blur and so it does the best it can in the narrow range of transitions. This is why figure 3) is almost solid black.
But, beneath the shimmery dark lurks something very fascinating: in a very compressed section of the grayscale are transitions and it is the aliasing mathematical error between them that we are seeing here. Kind of the reverse of the De-Moire document, this one generates great controlled Moire interferences.
Instead of invoking the quick Image > Map > Equalize command we can observe better what's going on if after Step 3 we go into Image > Adjust > Levels...
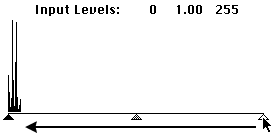
Fig 5) Levels... histogram after Fig 3) shows the extreme compression after the Find Edges filter
Move the White Triangle to the left...all the way to the beginning of the Histogram spikes
As you are moving the white triangle you are brightening the image by redefining which gray shades emerge as white. Note that the center grey triangle moves right along, centered between black and white point. (You can click and drag it as well, though.)
This happens to make a very good demonstration of what "Equalize" really does: You see the histogram spikes: Equalize automatically puts the black point (black triangle) to the leftmost (darkest) shade and the white point (white triangle) to the rightmost (lightest) shade, spreading the dark to light range of shades in an image to go from full black to full white.
It is still recommended to use `Levels...' rather than just `Equalize' in this case, because there are many other settings that might be of interest here... Just try it! You will be amazed at all the weird things that happen within half an inch of mouse travel...
Example of further Aura Play
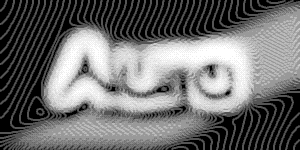
Fig 6) a few slight 30% blend gradations across and the technique yields 10,001 volts...
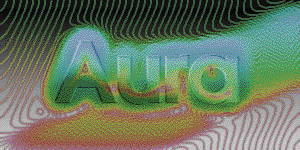
Fig 7) and just to get myself in trouble, this is what it looks like colorized...
(Teeming Millions : "Where is that stupid Colorization KPT!")
(Steaming Millionaire: "yeah yeah, nag, nag.It's free ain't it!")
In the last one, Fig 7), I superimposed the clean text at 30% opacity over the aura image. In fact that is the only reason I had you do the duplication step in the very beginning, to keep a clean copy around, because obviously this technique destroys the initial picture in the process... I recommend you keep making duplicates and muck around with them, rather than with the `clean' one.
Don't mistake this for something `to do with text' or `for four letter words beginning with "A"...' (There is such rampant literalism out there, you know who you are). This works with ANYTHING. Take a color image of a face. Copy: Blur, Find Edges, Equalize. Then Blend with original, or other Chops between multiple versions. Do it 50 times. Throw away the ugly 49. You are then beholding : Coolness.
With particularly stubborn problems, send me a small sample maybe I can cook up something.
Please let AOL, Compuserve, Adobe, MacWeek, MacUser and MacWorld know if you find these tips adrenalinesque.
Happy Photoshopping, Kai Krause
By Matthias Müller-Prove. Modified: 1/31/14

