
#7a Displace Filter Examples
There is a basic file in this folder explaining details of the Displacement Map process. Please read it first.
Following is only a short description of a particular filter, (which is part of this archive and can be applied to any image)
KPT Displace.Star Explosion
a) 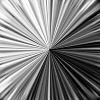
The horizontal offset is controlled by channel #1
The radial spokes in the displacement map alternate shades of grey and effectively stretch the image in thin strips.
fig 1b) 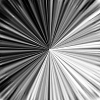
The vertical offset is controlled by channel #2
The Black spokes in the upper left quadrant pinch downwards, the white ones upwards forcing the image into a pinched similar radial starburst effect.
fig 2) 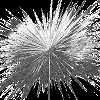
The combined effect at a scale setting of 33 / 33. The black areas stem from the "repeat edge pixel" option and may look different with other source images. Unlike other DMaps this one leaves no discernible image
fig 3) 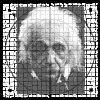
Variations on the scale setting: at 3/3 a subtle little ripple effect shows the beginning of the distortion.
fig 4) 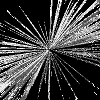
At full blast 99/99 the starburst is complete, the original torn beyond recognition. Be sure to surround your image with a black border (Select All, Edit > Stroke.. inside 3 pixels...) to get this effect.
Note: The image being displaced here is 200x200 pixels. If your image is larger you have to increase the Scale variables accordingly. Read the main Displace document for further details.
Discover, Displace, Describe the results in the KPT folder..... thanks, Kai Krause
You could add a note here if you have results to share with others. Fill out the feedback form in this library. Please let Compuserve and Adobe know if you find these tips useful. Please participate...