WWW NOTE: One Photoshop file is included in the Mac distribution. 92K total.
Note: To see this file correctly requires Word 5.0 with Times Roman font at 12, 18 and 24 points. To see the imbedded sample pictures be sure to turn off "Use picture placeholders" under Edit (or "Commands...")
IMPORTANT: Set the screen to "256 Greys" in Monitors or Switcheroo. Not "256 Colors" (Word then uses the System color table, which has only 16 greys and renders the sample pictures severely banded!)
Requirements: Photoshop, should work with any version, menu descriptions are for V2.0
Screen: This works down to 8 bit monochrome
Author: Kai Krause, Curved Space*Design, Malibu [...] For comments, questions, further variations there is a corresponding folder on Compuserve in the Graphics area: Go Graphics>Graphics B Vendor+ forum>HSC or Go KPT.
#7b Displace Filter Examples
There is a basic file in this folder explaining details of the Displacement Map process. Please read it first.
Following is only a short description of a particular filter, (which is part of this archive and can be applied to any image)
KPT Displace.Push from Behind
fig 1a) 
The horizontal offset is controlled by channel #1
The whirling black hole inside will displace that entire section toward the right, while the light grey will squeeze the image sides toward the left, without disturbances. The left edge at medium grey will hardly move at all. Surrounding the center, the varying shades of grey will break up the image and give the appearance of torn edges...
fig 1b) 
The vertical offset is controlled by channel #2
The vertical component is symmetrical to the horizontal. White here is upwards motion, the dark on the right moves down. Areas of equal gray shade will displace pixels intact.
fig 2) 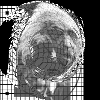
The combined effect at a scale setting of 33 / 33 gives an uncanny appearance of the center portion being pushed or shot from behind, including tears at the edges. Pretty neat....
fig 3) 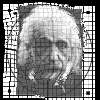
Variations on the scale setting: at 3/3 the left and top shows the start of the movement...
fig 4) 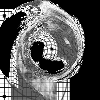
At 66/66 the motion is breaking up into chaotic areas.
Be sure to surround your image with a black border (Select All, Edit > Stroke.. inside 3 pixels...) to get this effect, otherwise the black areas will be filled with long trails of the edge pixels. Not necessarily bad, either.
Note: The image being displaced here is 200x200 pixels. If your image is larger you have to increase the Scale variables accordingly. Read the main Displace document for further details.
Discover, Displace, Describe the results in the KPT folder..... thanks, Kai Krause
By Matthias Müller-Prove. Modified:
5/1/20

